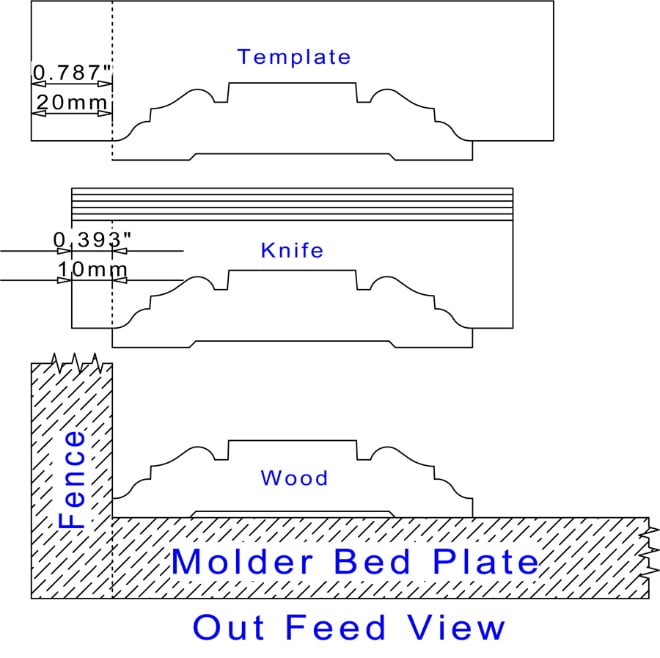
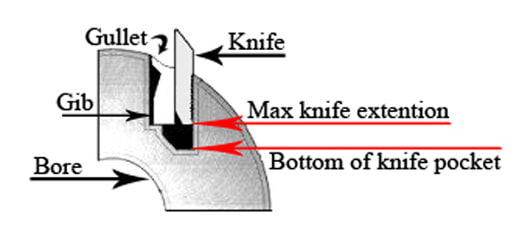
Here is some information on how to accurately cut & align high speed steel molding knife blanks for axial constant positioning in a cutter head with gib screw tightening recommendations. The image below will help give you a better understanding of how the acrylic template, knives and molder come into play with these set procedures.

- Cut knife steel to even measurements with an industrial chop saw. Let them cool down at room temperature, dipping them in cold water to cool down the steel quicker is not recommended, it could cause fractures in the steel that you won’t even notice and lead to knife breakage while milling .
- On bench the grinder, grind off burn marks left over from chop saw and break edges so the steel blanks seats properly in the cutter head. Now weigh the knives to exact weight of each other on a 2000 gram or higher balance scale . Clean cutter head and corrugations in preparation for knife insertion, an old toothbrush works well for this procedure.
-
Now place the cutter head lying horizontally on the workbench,
corrugations parallel with your chest and gib screws pointing away
from you. Keep in mind that rights and top cutter heads reference to
the very end of the cutter head right side, and lefts and bottom
cutter heads reference to the very end of the cutter head left side
side (see image below.)

-
It is not necessary that the ends of the knife be perfectly square.
When aligning the knives in a cutter head, always align the bottom ¼”
corner of the knife flush with the edge of the cutter heads reference
You will never grind this reference point away because you would be
out of the safety zone; therefore, this practice keeps the knife
reference point a constant. Remember the knives should never be more
than ¼” above the bottom of the knife pocket, this keeps the knives
fully locked in by the entire gib for safety purposes.


-
Tighten all gib screws equally; tightened with standard gib screw
wrench supplied by the manufacturer, start from center and tighten in
both directions. Although torque wrench is not necessary, it will give
you the exact torque needed. All screws should be tightened equally to
the following recommended by the manufacturer. I use Weinig moulder
cutter heads so I will use their recommendations.
- M10 gib screws - 25 Nm or 18 Ft. lbs.
- M12 gib screws - 30 Nm or 22 Ft. lbs.
If we can be of any further assistance, please feel free to contact us


